How To Grow Garlic
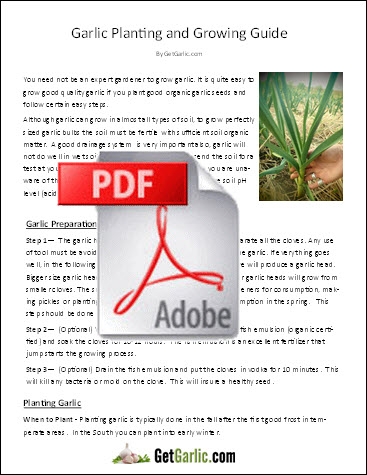
Download the "Garlic Planting and Growing Guide"
You need not be an expert gardener to grow garlic. It is quite easy to grow good quality garlic if you plant good organic garlic seeds and follow certain easy steps. This guide will show you how we have grown garlic and how you can grow it successfully also. Simply click the image and read it or print it for reading later.
Soil Preparation
Although garlic can grow in almost all types of soil, to grow perfectly sized garlic bulbs the soil must be fertile with sufficient soil organic matter (SOM) or detritus, and must have a good drainage system. It is good to add decomposed manure or fertilizer to condition the soil. It is also recommended to send the soil for a test at your local agricultural extension service in case you are unaware of the soil quality. To grow the best quality garlic, the soil pH level (acidity or alkalinity measure) should be 6 to 7.
Garlic Preparation
The moment before planting, the garlic heads must be broken apart by hand to separate all the cloves. Any use of tool must be avoided for this activity as you might damage the garlic. If everything goes well, in the following maturing season, every planted garlic clove will produce a garlic head. Bigger size garlic heads will grow from bigger cloves, and smaller garlic heads will grow from smaller cloves. The smaller cloves are kept aside by certain gardeners for consumption, making pickles or planting compactly to grow green garlic for consumption in the spring.
The Amount of Garlic Required
This depends on several factors. First off the variety of garlic, porcelains do not have as many cloves as rocamboles, for example, and second, the size of the bulbs / cloves. Big bulbs have more cloves but more importantly larger cloves. The larger the clove is that you plant, the larger your bulb will be in the spring. Below each category in the store there is a description of each variety and the number of cloves etc. Keep in mind this is only an estimate.
Planting
In the northern region, garlic is planted during the beginning of October, and in the south, it is carried out from November to January. If you live in the north, you must plant before the ground is frozen (i.e. around 4 to 6 weeks prior) to make sure that the root grows sufficiently before winter (for us in Wisconsin that is the middle of October). The cloves must be planted 3 to 4 inches deep, with the pointed side facing upward and the growth plate downward (where the root grows), then conceal it with soil and tap down. You must leave a space of around 5 to 6 inches between the cloves.
Mulching
After the planting process is completed, you must cover the cultivated area with 3 to 4 inches of mulch. You can use any readily available materials like straw, compost or leaves as the mulch. It is not recommended to use grass or hay as it will fill the bed with a lot of weed seeds. Dry mulch must be watered to prevent it from floating away. Mulching is necessary to keep the garlic insulated from temperature fluctuations during early spring and winter. Mulch can be left as it is to preserve the moisture of the soil and to facilitate the weed control, or it can be taken off in the spring after the risk of a harsh winter is not there.
Spring and Early Summer Care
Watering your garlic may be essential if you are living in dry climatic region. Garlic plants require uniformly damp soil, particularly when it is producing leaves; hence the soil must be completely wet. Soils that are sandy may have to be watered regularly. Weeds have to be kept to the minimum for the healthy growth of your garlic plants.
Scapes
A flower or bulbil called scape is produced by Hardneck garlic varieties during spring. When these scapes start to coil up, it must be cut off to facilitate healthy growth of the garlic bulb. However, these scapes are great gastronomic treats that are highly sought after by garlic connoisseurs and chefs. It can also be a wonderful decoration in a flower bouquet or floral arrangement.
Harvesting
Garlic is typically harvested in July, but that can certainly change depending on where you are at in the country and spring conditions. If you harvest it too early, it will result in smaller heads and late harvest will result in excessively matured garlic that will have lesser shelf life. The key indicator to know when the garlic is ready to harvest is the color of the leaves, which will turn yellow and tanned when ready.
When the garlics are ready to be pulled out, the leaves begin to dry out from bottom up, with almost half the leaves remaining green and half fully dried out. You can also determine if the garlic is ready by pulling few garlic heads. If the head has grown substantially and the bulb wrappers look tight with the cloves well-developed, they are ready to be harvested.
With a shovel, carefully dig out the head along with the plant. Harvesting must be carried out with great care without damaging the bulb. After cleaning the leftover soil, bundle them in groups of 5 or 10 plants, and leave it for curing by hanging them in a dry, warm and well-ventilated place for around three to four weeks.
In extreme humid climate the stems and roots must be taken off prior to the curing process. Once the curing process is over, make sure the clove coverings are dry inside the bulb, then prune their stem and roots and store them in a dry place (where the temperature is around 50 to 55 degrees) for the winter season.

